FPV Media Drone R&D Project: Phase Two
In our previous R&D post, we explored the design choices behind our move into custom-build FPV drones and UAV media capture, covering the frame architecture, component selection, and rationale for each decision.
This second phase focuses on the practical implementation of those plans. The parts are in, soldering is complete, and our training FPV drone is ready to fly. What follows is a technical walkthrough of assembly, configuration, simulation practice and fine tuning.
The key objectives for this stage were:
- Hardware assembly: transforming the training drone from concept to a fully functional aircraft.
- System configuration: establishing reliable flight control and integrated video/command systems.
- Performance refinement: tuning flight behaviour to achieve predictable, smooth, and controlled UAV responses suitable for cinematic media capture.
Aircraft Assembly
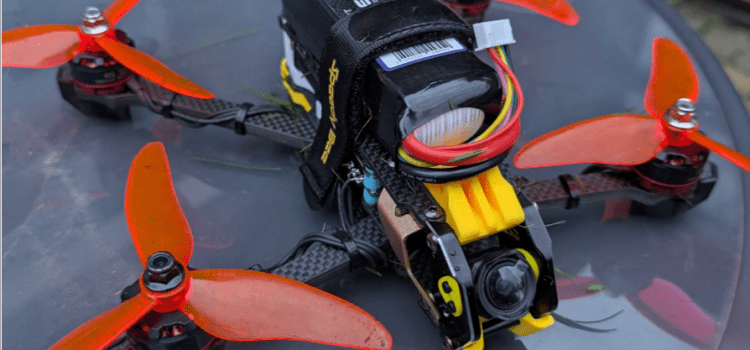
The first aircraft to move from concept to reality was the Training Drone. Unlike the Media Quad, this build prioritised resilience, repeatability, and mechanical familiarity over visual polish and payload optimisation. These principles guided every decision during assembly.
The training drone is built on a 5” frame, equipped with a Mamba flight controller stack and integrated with the DJI O3 Air Unit. This setup provides both high-definition video feed and the aircraft’s command-and-control (C2) link.
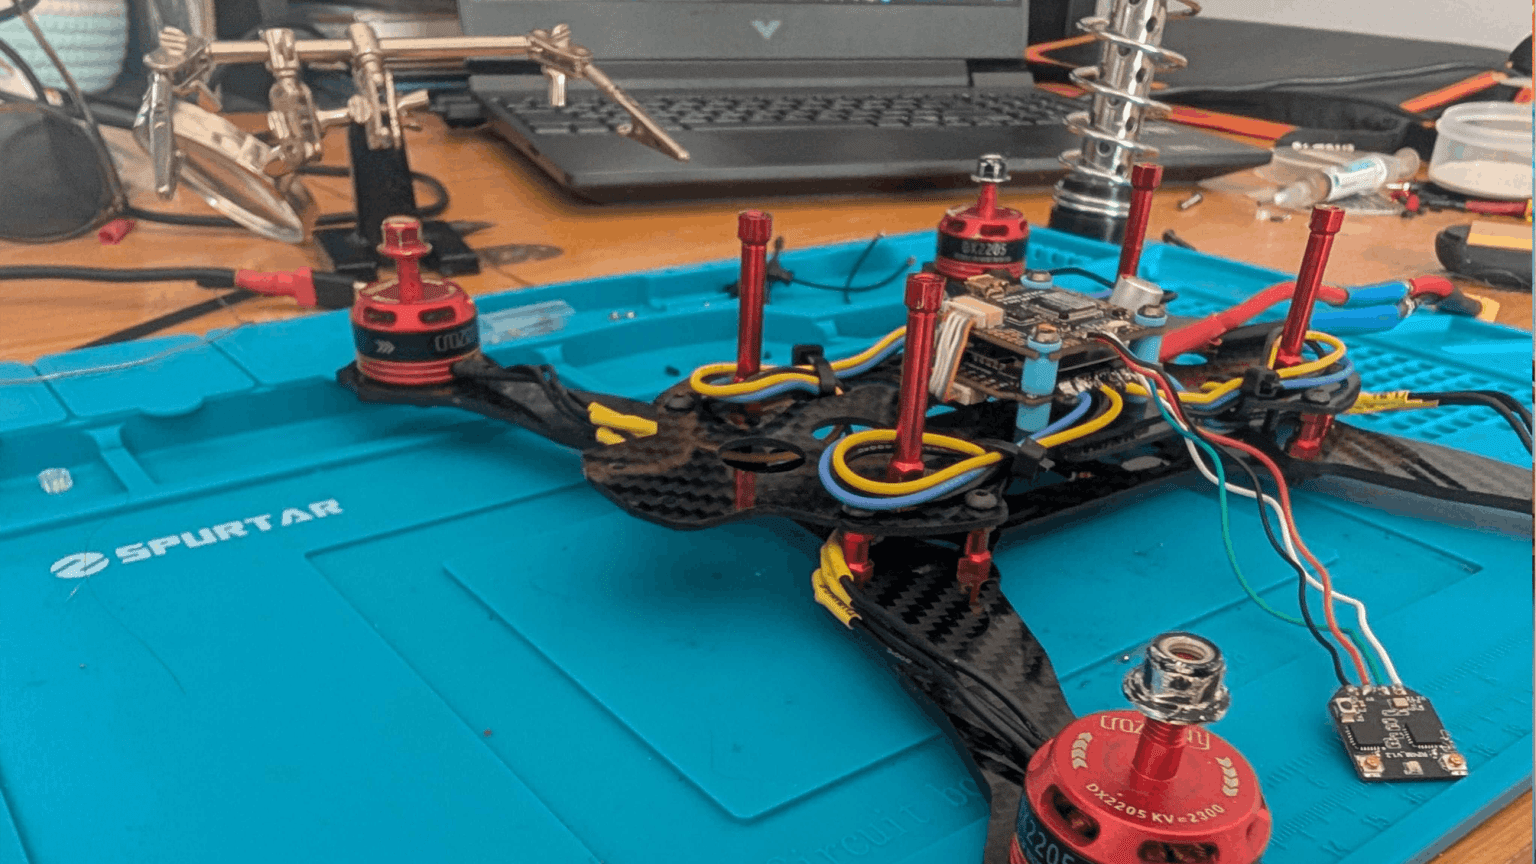
FPV drone parts prepared for assembly on a workbench, showing the layout of frame, motors, and flight controller alongside tools used for construction.
Initially, we considered a separate ExpressLRS receiver for control. While ELRS remains a capable low-latency protocol, integrating the DJI ecosystem simplified wiring, reduced potential failure points, and freed internal space.
Assembly began with a dry fit of the frame and components to optimise spacing, airflow, and cable routing. A custom TPU 3D-printed mount was added to secure the O3 Air Unit, protect it from strain, and simplify cabling. Once positioned, components were soldered and mounted to the airframe.
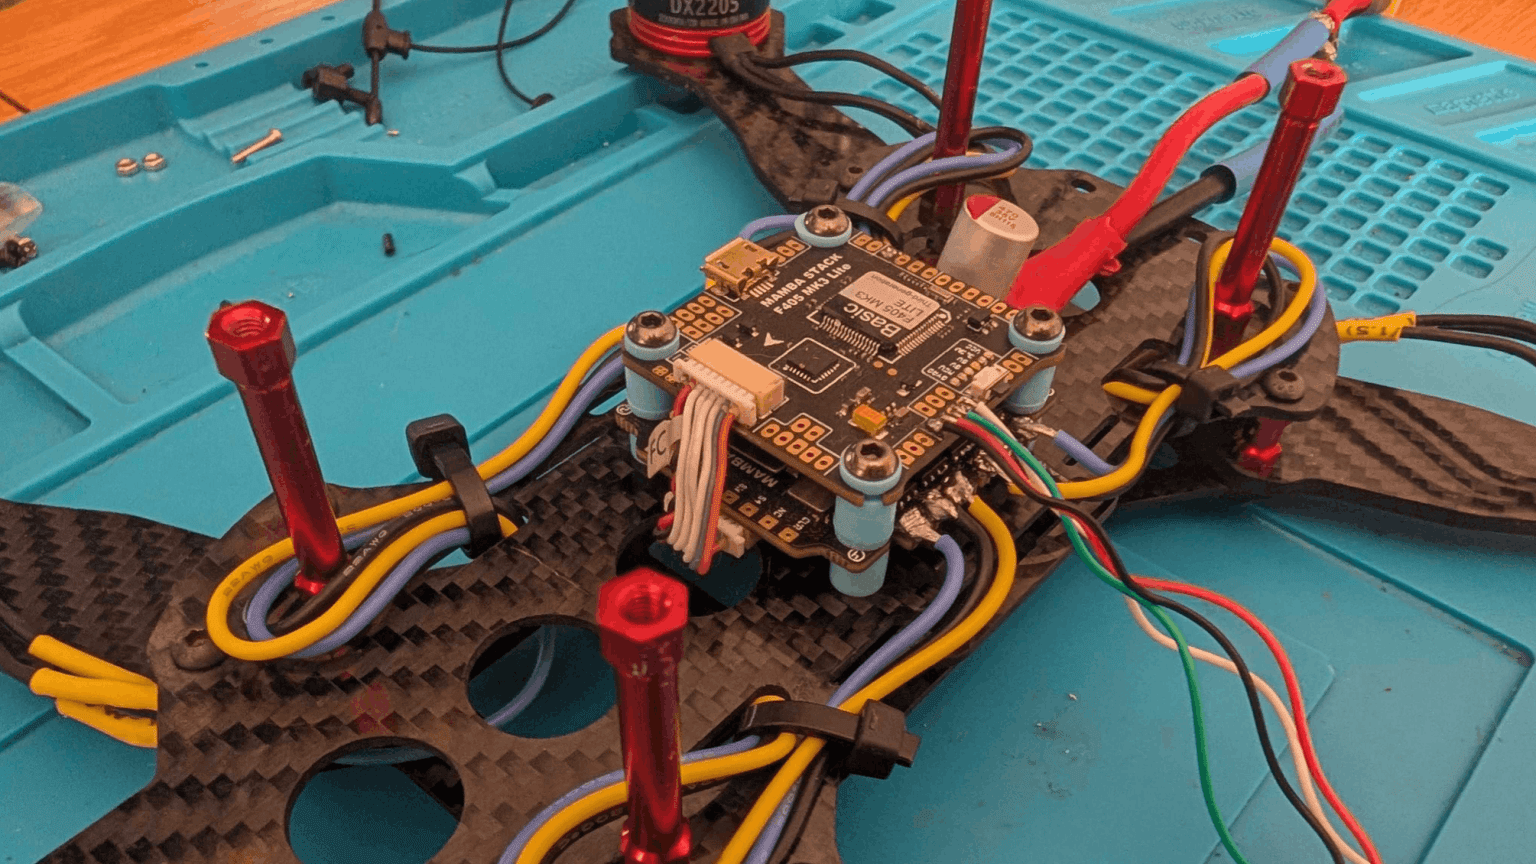
Detailed view of a training FPV drone with wiring and electronics exposed during assembly, highlighting component placement and integrated flight systems.
With the hardware in place, we moved to configuration. After a safe initial power-up, the flight controller was connected to Betaflight to verify orientation, calibrate sensors, assign correct ports for the DJI system, and confirm motor order.
Linking the O3 Air Unit to our HD goggles and controller activated both video and integrated C2 functionality. After configuring arm logic, failsafes, and on-screen telemetry, the aircraft was ready for tuning.
Simulator Training
While the Training Drone was being assembled, the team focused on developing FPV piloting skills in virtual simulators. FPV flying is a distinct experience from conventional camera drones: faster, immersive, and heavily reliant on instinctive control.
Using simulators during the build phase allowed us to refine throttle management, improve coordination through complex turns, and build consistent control without risking hardware.
Repeated practice sessions on regularly updated maps, reinforced muscle memory and spatial awareness. These practice sessions laid the foundation for precise, controlled flights in real-world environments, which are essential for dynamic UAV media capture.
Flight Testing & PID Tuning
With hardware assembled, configuration complete, and simulator hours logged, we shifted to real-world flight testing. Assembly is only the starting point; the aircraft’s flight personality is shaped in the air through PID (Proportional-Integral-Derivative) tuning.
The PID loop compares pilot inputs to actual aircraft behaviour and makes thousands of micro-adjustments per second. Proper tuning controls responsiveness, smoothness, and stability, ensuring the drone settles predictably after manoeuvres.

Software interface used to adjust PID (Proportional-Integral-Derivative) parameters for precise FPV drone flight performance and stability.
Our intention was not aggressive racing performance, but composed, smooth flight suitable for cinematic aerial footage. Adjustments were made incrementally with repeated flights under similar conditions to compare behaviour. The result is a consistent, reliable FPV drone capable of precise media capture and repeatable performance.
Conclusion
With the Training Drone complete, it is now ready for purpose-driven flights. The focus will shift from simulator lines to real environments, refining flight paths and beginning dynamic, close proximity aerial media capture.
Future updates will document flight hours, tuning insights, and FPV integration into our UAV media services, demonstrating how this specialised platform enhances cinematic footage and operational reliability.
Contact Us
At Survey Air, we offer specialist drone media services tailored for industry applications, including RAW drone filming & photography, specialist first-person view (FPV), ground-based media and video production services.
If you are interested in using our UAV media services for your next survey or project, please contact our expert team today to request a free quote and consultation.